“The Real Deal” Hamburger Buns (Paleo)

Hey Everyone!

Thanks for hanging in there during these times when I am not able to post much. I have just reached my first “break” for the NTP course through the Nutritional Therapy Association! So far it has been absolutely INCREDIBLE! I have learned so much and met soooo many wonderful, likeminded people! I highly recommend looking into it if you also have a passion for helping yourself and others heal by using the power and intuition of the body and nutrient dense foods.

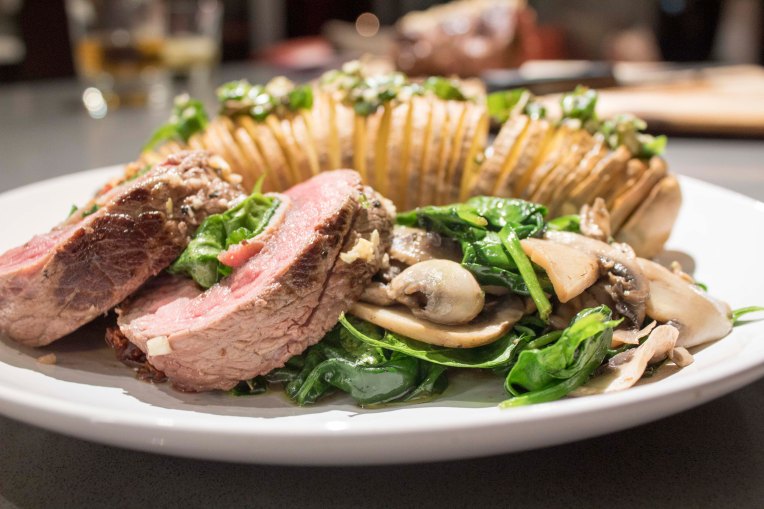
While I think I have finally found a happy balance of doing school work again with my daily life activities, I tend to always tip the scale towards doing “too much” and running myself into the ground (at a steady rate). Just when I think I am pretty efficient at doing A-Z tasks, I realize there is always room for improvement. So, lately I have tried being less lackadaisical when it comes to meal prep (thinking that basic, quick, daily meal prep and shopping was the best route) and really focused on having one or a maximum of two full meal prep days where I make most of my meals (and my clients meals) in one chunk of time. Not only does this get me to plan more creative meals but also gives me a chance to try out new fun recipes myself and takes the extra hour out of other days that I would normally stop what I am doing to shop-cook-etc.

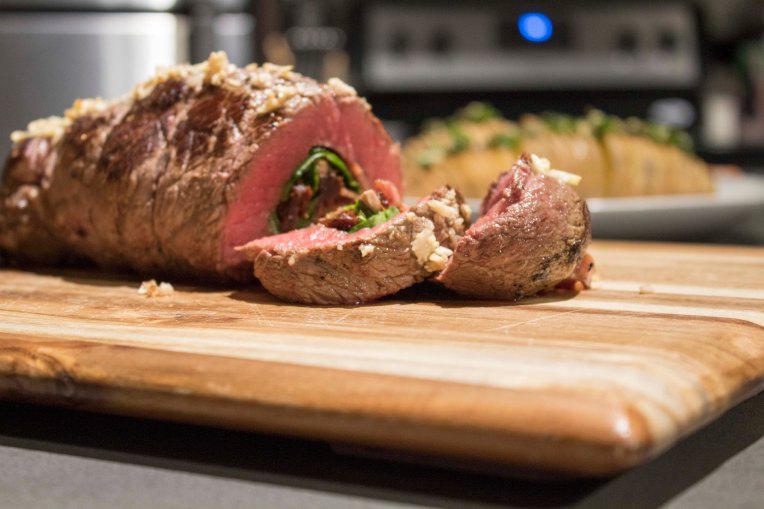
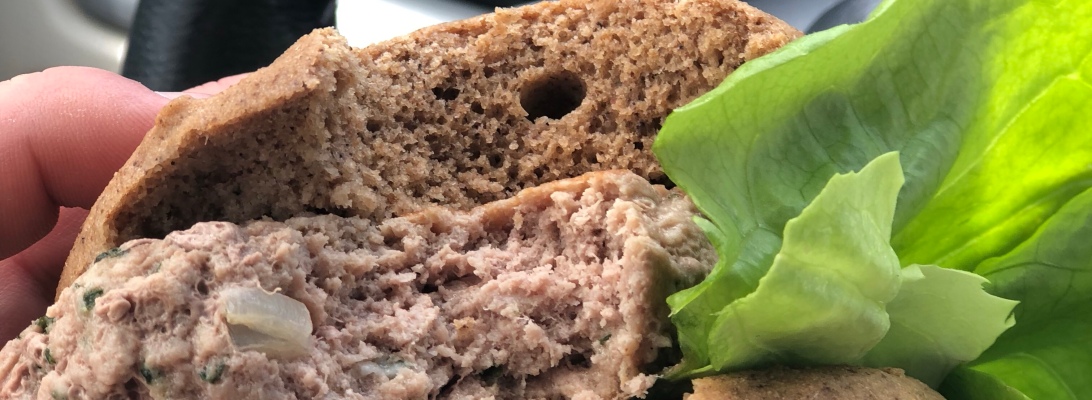
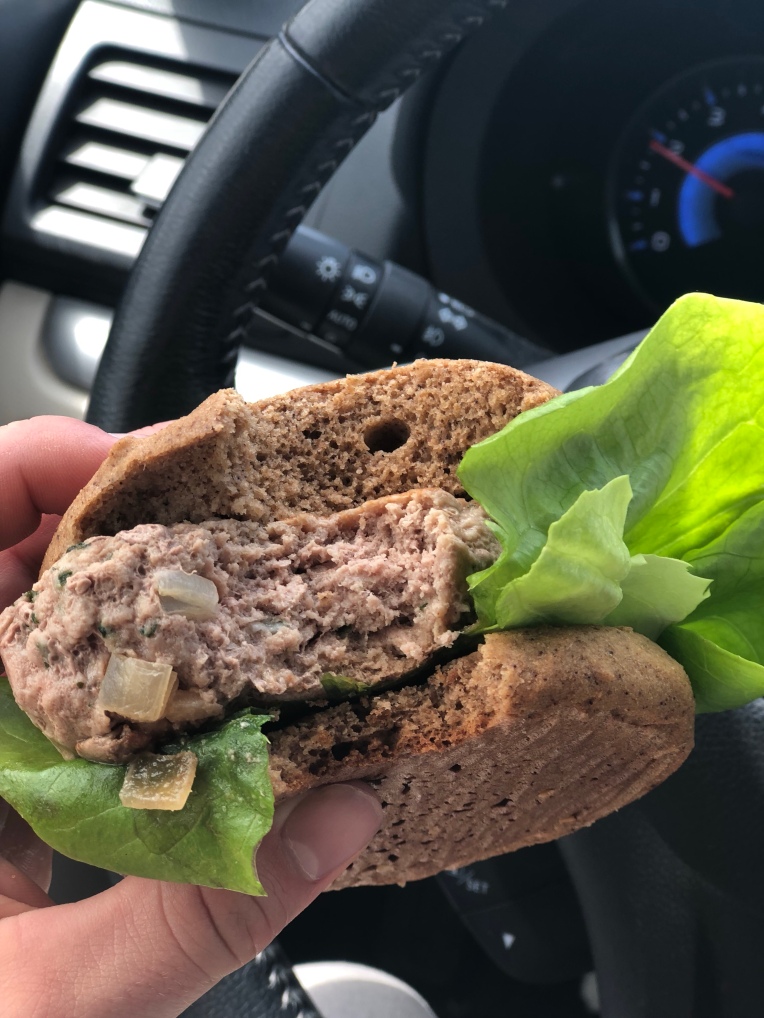
For the past MONTH (or so) I have been working on making a paleo hamburger bun that actually resembles a typical hamburger bun. Mostly I’ve gotten a lot of things that taste good but don’t have the right consistency, until now! By total accident, I made this bun with two types of flours, and to my surprise they both came out wonderfully. The cassava flour version of this bun is slightly less-moist and has an awesome macro-ratio for those that are following specific macro-oriented eating plans, while the cashew flour version is a bit more spongey and higher in fat (which is certainly not a bad thing, you need those good fats!). Try them out and let me know which version is your favorite!
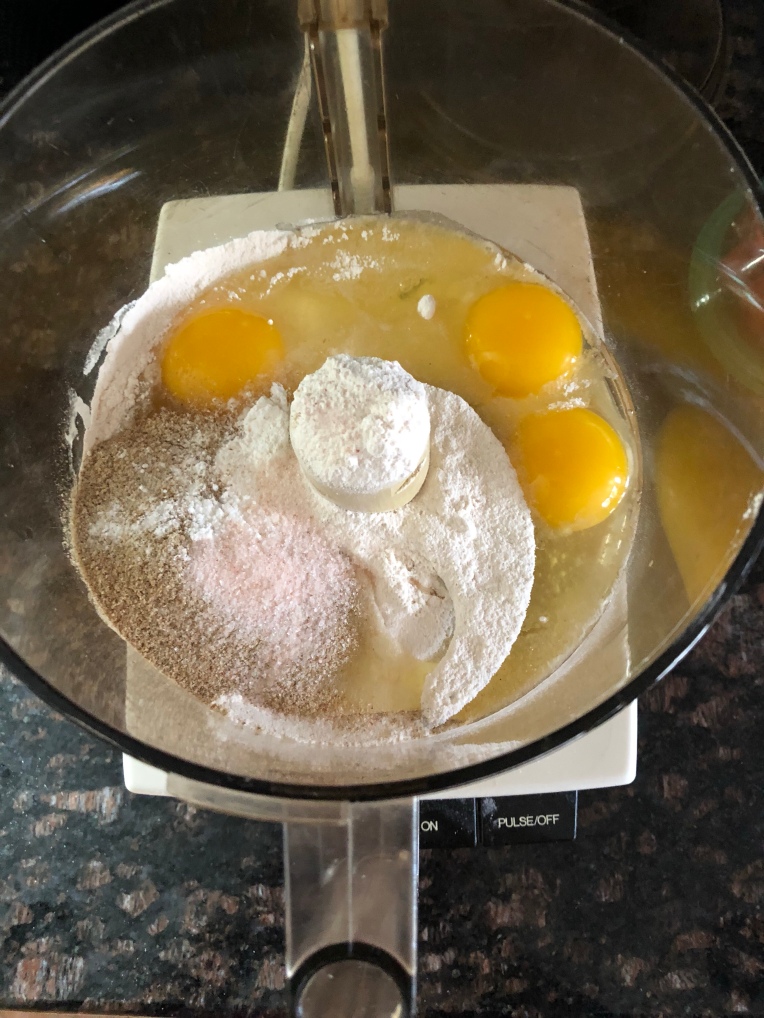
Ingredients:

  • 3/4 Cup Cassava Flour (or 1 cup Cashew Flour)
  • 3 TB Psyllium Husk Powder
  • 4 free-range, organic eggs
  • 1/2 Cup Unsweetened Applesauce
  • 1/3 tsp. Natural Baking Soda
  • 2/3 tsp. Cream of Tartar
  • 1/2 tsp. Sea Salt
  • 1 tsp. Toasted Sesame Seeds (optional)

Instructions:

-Preheat oven to 400 degrees and line a baking sheet with parchment paper.

– In a food processor, combine all ingredients and blend until fully combined.

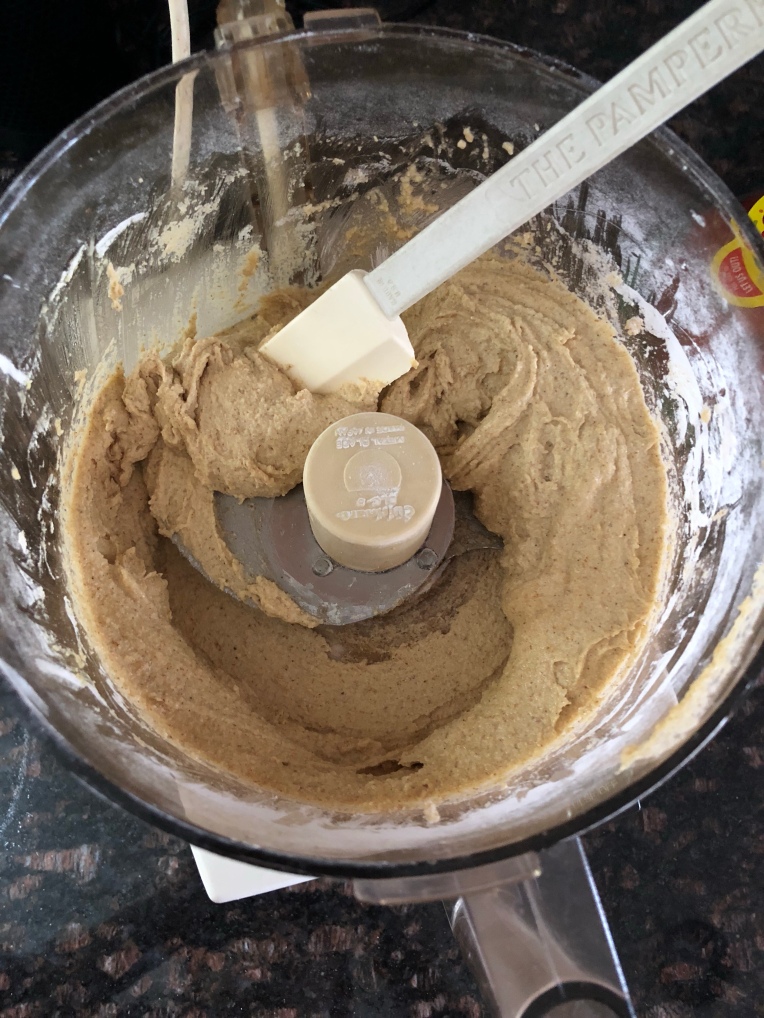
-Let the mixture sit for a minute to fully absorb the liquids, then with damp hands, form dough into 4 large balls (the dough will be wet and sticky but will hold a “hamburger bun” shape).

-Sprinkle the tops with sesame seeds if you’d like!

-Bake for 20-25 minutes until the tops start to turn golden brown.

-Let cool for 2-3 minutes and then cut in half and enjoy with your favorite burger!

Macros Counts:

Cassava Buns (1 bun)= 157 Calories, 4.9g Fat, 21g Carbohydrates, 6.8g Protein.

Cashew Buns (1 bun)= 265 Calories, 20.7g Fat, 12.7g Carbohydrates, 12g Protein

Sweet Potato Sloppy Joe Sliders (Paleo)

I’m not going to lie, the holidays are crazy, and so is my schedule right now! Instead of boring you with my weekly life-lessons and updates, we’ll just get right to the point. Here is a fun recipe that turns another childhood favorite into a more sophisticated, comforting meal. I hope you enjoy it as much as I (and a few taste testers) did!

Ingredients:

  • 2 medium sweet potatoes, cut into 1/4″ thick rounds
  • 1 TB. avocado oil
  • 1 TB. coconut oil
  • 1 lb. grassfed ground beef
  • ¼ tsp. sea salt
  • ¼ tsp ground black pepper
  • 2 medium yellow onions, diced
  • 1 celery stalk, finely diced
  • 1 garlic clove, minced
  • 1 TB. tomato paste
  • 1 tsp. ground cumin
  • 1 tsp. chili powder
  • ½ tsp. paprika
  • 1 TB. raw honey
  • 2 tsp. apple cider vinegar
  • 3 TB. water
  • 1 cup spinach leaves (optional)

Instructions:
-Preheat oven to 400 degrees (F)

-In a large bowl toss the sweet potato rounds in avocado oil, salt and pepper

-Place seasoned sweet potato rounds on a large baking sheet lined with parchment paper and bake for about 30-35 minutes, flipping halfway

-While potatoes are baking, add the coconut oil to a large skillet over medium heat and cook the beef until only a little pink remains

-Add the onion, celery and garlic and continue cooking for 2-3 minutes

-Add tomato paste, cumin, chili powder and paprika to the meat mixture and stir for 1 minute

-Add the honey, apple cider vinegar, tomato sauce and water to the mixture, stir to combine and summer on low for 5-10 minutes. Season with salt and pepper

-Once the sweet potatoes are done cooking arrange them on a serving plate with toppings of your choice! I like to add spinach leaves for a fun color pop (they also hold on the meat quite well) or you could use larger lettuce leaves as a “boat” for the sliders

Mint Chocolate Macaroons (Paleo)

Well I’ve officially “moved” from the hills of western mass back to my home town near boston. My house is still on the market so my feet are still somewhat tied but on a weekly basis I’ve begun working my new jobs and living out east full time! It’s WONDERFUL to not have to drive back and forth across the state every other day and I believe most of the craziness has past but there is still so much that I need to organize and settle into. So far I am LOVING my new jobs as a coach at Crossfit Tri County and a waitress/bartender at an awesome super busy restaurant in Dedham. I’m on track to enroll in the Nutritional Therapy Practitioner course through the NTA starting in February which has been on my to-do-ASAP list for far too long, my new living situation and job flexibility will allow me to finally continue my education in the field I am most passionate about.

While all this news sounds so positive and “Merry”, if you asked me how I was doing just a few days ago I wouldn’t have been able to answer because I was overwhelmed with sad, negative, self-degrading emotions. The ups and downs of change and, in this case, huge life transitions can really mess with your brain and challenge your internal strength but ultimately there will always be good and bad days, happy and sad moments, comforting and fearful experiences. No matter what life throws your way its important to stay present and remember that you can only control you; how you react, how you behave, how you feel. Feeling emotions isn’t a bad thing, but letting them affect your life in a negative way is. If something is causing you pain and you can remove it from your life, you need to take charge and remove it. If some reoccuring thoughts are causing you to be unable to move forward, you need to confront them and forgive yourself so that you can move on. Life doesn’t always present you with rainbows and butterflies, or maybe it does but we just cant see them because we are too upset about the rain? Food for thought. 🙂

Now, enough of that, back to the reason why you’re here: here’s a super easy and festive recipe you can whip up to bring to your next holiday cookie swap or party. Enjoy!

Ingredients:

  • 3 cups unsweetened shredded coconut
  • 1/2 cup cacao powder
  • 1/2 cup honey
  • 1/2 cup coconut milk
  • 1/2 tsp peppermint extract
  • 1/4 tsp vanilla extract
  • 1 egg white
  • dash of sea salt

Instructions:

-Preheat oven to 325 degrees (F)

-In a large mixing bowl combine all ingredients except egg white and salt

-In another bowl whisk egg white and salt with a hand mixer on high for 1-2 minutes until stiff peaks form

-Carefully fold egg white into the coconut mixture until well combined

-Scoop balls onto parchment lined backing sheet

-Bake for 30 minutes

-Remove from oven and let cool to room temperature

-(Optional) melt 1/2 cup dark chocolate in a small bowl and mix in 1/4 tsp peppermint extract (alcohol free). Dip the bottoms of each macaroon into chocolate and place back on parchment paper until chocolate has solidified

AB&J Bars (Paleo)

If you were to name some of your favorite snacks from when you were a kid (who knows, maybe you still eat the same?!) what would they be? I can imagine somewhere between mac & cheese and grandma’s homemade cookies, you thought of peanut butter and jelly. There’s just something about the combination of bread, creamy peanut butter and sweet and tangy jelly that is hard to resist. While the bread, peanuts and conventional jelly may not be paleo approved, here’s a great trade off that will surely satisfy all the PB&J cravings you’ve ever had. 🙂

Ingredients:

  • 2 bananas, overripe
  • 3/4 cup almond butter
  • 1/4 cup honey
  • 3 eggs
  • 1 tsp vanilla extract
  • 1/4 cup coconut flour
  • 1/4 tsp cinnamon
  • 3/4 tsp baking soda
  • 1/3 tsp cream of tartar
  • pinch of sea salt
  • 1/3 cup homemade jam
  • 1 tsp coconut oil

Instructions:

-Preheat oven to 350 degrees (F).

-Grease a 9×9″ baking sheet with coconut oil. I use a pre-divided pan which takes the hassle of cutting these right out! You can also use a muffin pan instead.

-In a large mixing bowl combine bananas, almond butter, honey, eggs, and vanilla. Mash and mix thoroughly until no chunks remain.

-Add coconut flour, cinnamon, baking soda, cream of tartar and salt to the banana mixture and stir to combine until smooth.

-Add half of the batter to the greased pan (which ever type you decide to use).

-Then add then jam (make sure it’s laid out evenly and somewhat flat) over the banana mixture.

-Add remaining batter over the top to cover the jam completely.

-Bake for 25-30mins or until these start to become golden brown. Let cool for 5 minutes before taking a butter knife (or toothpick) to ensure the edges are not stuck and remove from the pan.

-Cut into 12 bars and enjoy! *Be careful, these are addicting!*

Macros! If you are counting or keeping track, the macronutrient profile for 1 bar is: Calories (210) Protein (6g) Fat(11g) Carbohydrates (23g)

fullsizerender


Lamb Stuffed Delicata Squash (Paleo)

You know how life goes, just when you think something is going to go down a certain way, things change. It’s the story of my life, and probably yours too. Amidst getting ready to celebrate thanksgiving with my family I received news that the offer on my house had fallen though, the same day that I had just accepted two new jobs in the area I had intended on moving to. Obviously all of the change, the new jobs, and etc. were based on the fact that my house was going to sell and that was seemingly going to be a quick process, so you can imagine the chaos that went through my mind after getting this news. Coincidentally when I got this phone call I was at my parents house, it’s always a blessing to have people around that love and support you no matter what when the sky feels like its suddenly falling on you. To my surprise, my dad, who can at times be quite negative (in a protective, only wanting the best for his daughter, kind of way), had the most positive reaction to the situation and said something I always say, “what’s meant to be will happen, something better will come”. Seeing my dad staying positive in this situation reminded me that everything I had been working towards in my “new” life: objectives, goals, and plans; was correct. Just because this one piece of the puzzle didn’t fit where I expected it to doesn’t mean that it won’t fit somewhere else- where it is supposed to be. The house is now back on the market, showings are often, another open house is planned, I start one of my new jobs tomorrow and I couldn’t be happier to start this new chapter in my life. Sometimes the things worth having in your life take the most work, but in the end the struggle makes the success that much sweeter. Just a little monday motivation to keep pursuing those goals 😉

Oh yah, and that recipe thing! Lamb isn’t something I’ve always loved but I’ve recently found that when it’s paired with the right ingredients it can be quite tasty and a nice change from my go-to proteins. I found this amazing locally sourced ground lamb and local produce from my favorite spot, River Valley Market. I highly recommend finding a trusted butcher or market that can tell you about your meats: where they come from, how they are treated, meet the farmer if you can! The most nutrient dense meats come from healthy, happy animals and supporting these sustainable and ethical farming practices is beneficial for the consumer, the producer and the environment alike. Happy cooking!

Ingredients:

  • 2 delicata squash, halved and de-seeded
  • 1 lb. ground lamb
  • 1 TB. coconut oil
  • 1 medium yellow onion, diced
  • 1/2 orange, zested and juiced
  • 1/4 cup mint, finely chopped
  • 2 TB. fresh rosemary, finely chopped
  • 1 clove garlic, minced
  • salt and pepper to taste
  • 1/4 cup pomegranate seeds

Instructions:

-Preheat oven to 350 degrees (F)

-Place the halved squash face up on a baking sheet and bake for about 30 minutes or until it can be easily punctured by a fork

-While the squash is cooking, heat coconut oil in a large saucepan over medium heat

-Add onion to the saucepan and cook until translucent, 3-5 minutes, then add garlic and ground lamb, using a spatula to break up lamb into small chunks

-Cook lamb until mostly brown then add in orange zest, juice, rosemary, mint, salt and pepper, turn to summer and cook for 2-3 more minutes

-Remove from heat and set aside until squash is done cooking, then fill each halve of squash with the lamb mixture and return to the oven on broil for 2-3 minutes until the tops are slightly crisp

-Remove from oven, garnish with pomegranate seeds and serve!

Turkey Stuffed Bell Peppers (Paleo)

My life has been pretty darn hectic lately with a lot of big changes. Normally change has been a cause of anxiety for me (and lets be honest, at times it still gets to me!) but I have been doing the best I can in taking things day by day, moment by moment, and seeing the positive in each situation. For instance: I’ve recently accepted an offer on my house, which is great! It was only on the market for 5 days before I got my first offer and signed the P&S after 9 days! Now, pending inspection, things are moving quite fast and it seems that the closing date is going to be MUCH sooner than I anticipated. After having JUST gotten settled at my new job, new gym, new weightlifting program, and new schedule, of course another curve ball comes my way. BUT- I knew it was coming, eventually. The only thing that has changed is the timing, which, in the grand scheme of thing, isn’t a huge deal, right? Well, I keep telling myself that. I am a firm believer that everything happens for a reason (as corny as that sounds) and therefore stressing over things like this serves no purpose. I’ve always been one to take life by the horns and run with whatever is thrown at me so even though my plans for the future aren’t clear at this point in time, I know that it will all pan out as it should and I will be able to look back and appreciate these moments as they are the ones that spur growth, acceptance, and self discovery.

So, how does this rant tie into Stuffed Peppers? 😉 Easy- stuffed bell peppers are a pretty mindless meal that you can throw together quite easily with just about anything you have laying around in your refrigerator. Not only will it look like you created this fancy meal (because you did) but if you know the basics of meat and seasonings that go well together they are bound to taste good as well! This is one of my go-to variations because most of these ingredients are almost always found in my fridge (less things to forget at the grocery store) and you can also add some kind of sauce like coconut aminos, thai ginger, peanut, curry, teriyaki, etc. to easily kick these up another notch. It’s a great recipe for when life is cray and you don’t have any brain power left to get too creative. Try them out and let me know what you think!

Ingredients:

  • 5 bell peppers, tops cut off and seeds removed
  • 1 lb. ground turkey
  • sea salt and black pepper to taste
  • 1 TB coconut oil
  • 1 clove garlic, minced
  • 1/2 cup white mushrooms, chopped
  • 2 cups cauliflower, riced
  • 1/2 cup spinach, finely chopped
  • 1/4 cup cilantro, finely chopped
  • 1/4 cup parsley, finely chopped
  • chopped fresh scallions, for garnish

Instructions:

-Preheat oven to 350 degrees (F)

-Place bell peppers, upright, on a rimmed baking sheet and set aside

-Melt coconut oil in a large skillet over medium heat, add onion and cook, stirring occasionally, until onions become translucent, about 5 minutes

-Add garlic and ground turkey to skillet and cook until no longer pink, about 5-7 minutes

-Add the cauliflower rice and mushrooms to the ground turkey and sauté for about 5 minutes. Then add spinach and cook until soft, about 2 minutes

-Remove skillet from heat and add in parsley and cilantro, stirring to incorporate

-Carefully stuff each bell pepper with the turkey mixture and bake for 20-25 minutes or until the peppers are soft

-Optional: after 20-25 minutes set the oven to broil and broil peppers for 2 minutes to get a little crispiness on the tops!

-Garnish with scallions and enjoy!

Pecan Pie Tarts (Paleo, Vegan)

Fall… aka #PieSeason! This is the time where I feel terribly for anyone with a pecan allergy, because pecan pie is literally one of the most delicious desserts ever created (in my opinion). These tartlet variations aren’t the most cut and dry of recipes, but one batch makes quite a few and I love being able to grab one here and there versus the looming pie-left-must-eat feeling you get when you try to slowly work your way through a full sized pie. It’s also pretty much guaranteed that these will be scooped up quick at any holiday party as well because they are so *cute* and no one wants to be the first person to cut into a perfectly untouched pie. In the recipe I use fancy little tartlet pans but you can also use a cupcake (or mini-cupcake) pan as well. Enjoy!

Ingredients:

(Tart Shell)

  • 2 1/4 cup almond flour
  • 1/4 tsp sea salt
  • 1/4 tsp baking soda
  • 5 TB coconut oil, melted
  • 3 TB maple syrup
  • 1-2 TB almond milk
  • 1 1/2 tsp vanilla extract

(Filling)

  • 1/3 cup dates
  • 5 TB maple syrup
  • 1/4 cup coconut oil
  • 1 TB almond milk
  • 1/4 tsp vanilla extract
  • 1/8 tsp sea salt
  • 1 cup pecans, finely chopped
  • 1/2 cup pecans, halved lengthwise

Instructions:

-Preheat oven to 350 degrees

-In a small bowl combine almond flour, salt and baking soda

-In another small bowl mix together melted coconut oil, maple syrup, almond milk and vanilla.

-Add wet ingredients to dry ingredients and mix until thoroughly combined and no clumps are left.

-Grease mini tartlet pans with coconut oil and add in one 1 inch diameter ball of dough to each, pressing them evenly into each crevasse of the mold

-Cut 2 inch squares of aluminum foil and then make one cut to the center of each square. Place a piece of foil into each tartlet pan pressing down gently.

-Fill each mold with a weighted object that wont cook in the oven- I use raw beans.

3F8A8164-F8E3-435E-9DAD-D500193DD4E8

-Bake for 12-14 minutes or until a light golden brown appears on the crust.

-Remove from oven, carefully remove the foil with beans and let the shells cool for about 5 minutes.

-Using a toothpick gently reach into the edge of the crust and pan and start to loosen the tartlet on 2-4 sides.

*Sometimes these pop out pretty quickly and sometimes they take some patience and TLC. I’ve found that there seems to be an optimal time to remove these from the pans but have no fear you will learn quickly when they are ready and when they are not.

-While the tartlet crusts are coking you can start the filling.

-Soak dates in hot water for 10 minutes

-In a sauce pan over low heat combine maple syrup, coconut oil, almond milk and vanilla. Remove from heat when melted.

-Add soaked dates,maple syrup mixture and salt to a food processor and process until smooth.

37418189-D35D-4710-96F5-BE77743E92E2

-Move mixture back into cooled saucepan (or another bowl but I like to minimize my clean up time) and add in finely chopped pecans, stirring until well combined.

0C45DA10-14A6-48DD-B1D6-68D3AD8CAFF0

-Add one spoonful of filling to each cooled tartlet then carefully place halved pecans in a star shape.

Enjoy these warm or store in the fridge (14 days) or freezer (up to 3 months)!

Flank Steak Roulade (Paleo)

Recently I’ve had  lot of friends interested in and trying out meat-less diets. One large correlating factor is a food-related documentary they each had watched. After hearing their reviews I instantly had flashbacks to my freshman year in college. As an animal science major (at the time) we watched something very similar in essence- but instead of highlighting the animals as “food quality”, they were focused on as an example of poorly regulated, mass produced, unethical farming.

Now, I LOVE all animals and if I personally believed that humans weren’t made to eat all sorts of things (including animals) I would totally be cool with never eating meat again. I strongly believe that everyone has the right to choose how and what they eat, but I think the big picture in the meat-versus-no-meat debate is the quality of the meat- which stems from the quality of the life of the animal- including how and what they are fed.

There is without a doubt some horrendous, malicious practices going on in the world that I do not at all support. How? Because I choose to buy meat locally- from farms and farmers that I know- animals that I have seen enjoying their lives in big fields. I suppose being out in the sticks of Western Mass it’s easy to access fresh and local meat and produce, but it also certainly isn’t impossible to find something of similar quality living in the midst of a big city, it just takes a little more research.

The moral of the story? If you’re going to eat meat: do your homework and support the people who treat their animals as they should be treated. Healthy, happy animals means healthy, nutrient dense meat!


Ingredients:

  • 2 lbs grass-fed flank steak
  • sea salt and black pepper to taste
  • 4 strips turkey bacon, cooked softly and chopped
  • 2 cups spinach
  • 1/3 cup sundried tomatoes
  • 1 cup white mushrooms, chopped
  • 5 cloves garlic, minced
  • 2 TB coconut oil

Instructions:

-Preheat oven to 425 degrees

-Pound the flank steak until its an even 1/3 inch across

-Season with salt and pepper then layer the bacon, tomatoes, spinach and mushrooms evenly over the steak

-Roll the steak tightly and secure with butchers twine

-Heat coconut oil in a large skillet over medium heat and sear the roulade on each side (about 2-3 minutes per side)

-Remove from skillet and sprinkle minced garlic over the top. Place roulade on a baking sheet and bake for 10-15 minutes or until cooked in the center

-Remove from oven and allow to cool for 10 minutes before removing twine and slicing into pinwheels, serve and enjoy!

070B2BA8-D0F3-42C9-AEB7-F47079D4E2ED

Pair this with last weeks Hasselback Sweet Potatoes and sauté your extra veggies for a complete meal!

F3A33DD0-70D3-4C1F-BCD3-EC0C4ED936E3

Photographs by Billy Willbanks. DSMP marketing. Instagram @wbanks85.

Hasselback White Sweet Potatoes (Paleo)

As an athlete it’s important to fuel your body appropriately in order to maximize your performance and recovery. Having an active job along with a dog that requires a long hike or run daily and somewhere between 1-2.5 hours of training each day, the amount of carbohydrates my body needs is sometimes overwhelming. Being on the go so often my sources of carbs are often the quick and easy varieties such as rice and gluten-free oatmeal, but when I have the opportunity to be in the kitchen for a period of time, my all-time favorite source of carbs are white or japanese sweet potatoes (Japanese have red skin and domestic have golden skin). These tend to get crispier than yams and orange sweet potatoes as they are higher in carbohydrates but still contain a vast amount of micro nutrients. This cooking variation is not only delicious but a sure way to raise some eye-brows and get some “fancy” remarks from your friends and family- as a bonus, it’s also super simple! You can also do this with any potato, but if you’ve never tried white sweet potatoes… you definitely should!

Ingredients:

  • 3 large white sweet potatoes
  • 1 TB melted ghee
  • dash sea salt

Instructions:

-Preheat oven to 400 degrees

-Line baking sheet with foil (or parchment paper)

-Thoroughly wash sweet potatoes and with a sharp knife start making vertical cuts from end to end leaving about 1/4 inch from the bottom of the potato all the way across


-Place potatoes on baking sheet and brush with melted ghee then sprinkle with sea salt


-Bake for about 60 minutes or until the potatoes are soft

-Remove from oven and top them with something tasty! Some options are crumbled bacon (you can add this before cooking, simply cook bacon most of the way in a pan, chop finely and sprinkle over potatoes), grass-fed cheese (if you can handle dairy, this can also be added when there is about 5 minutes of cooking time remaining), or something a little more complex like garlic and herb butter (2 TB ghee or grass-fed butter, 1 clove minced garlic, 1 tsp fresh chopped rosemary, 1 tsp fresh thyme and 2 tsp fresh scallions.. add to a small bowl and stir together!)

Enjoy! 


Photo by Billy Wilbanks. DSMP marketing. Instagram @wbanks85